In my previous post I described our Ballerina Sugar Art Workshop with Grace Stevens of Cupcakes by design and I posted the photos of our pretty completed figurines. As the theme of the workshop was creating this dramatic cake topper which would delight any girl on their birthday cake, I thought I would share our sugar dance with you and show you how we completed our graceful sugar figurines.
Act 1 … Perfectly Pointed Toes!
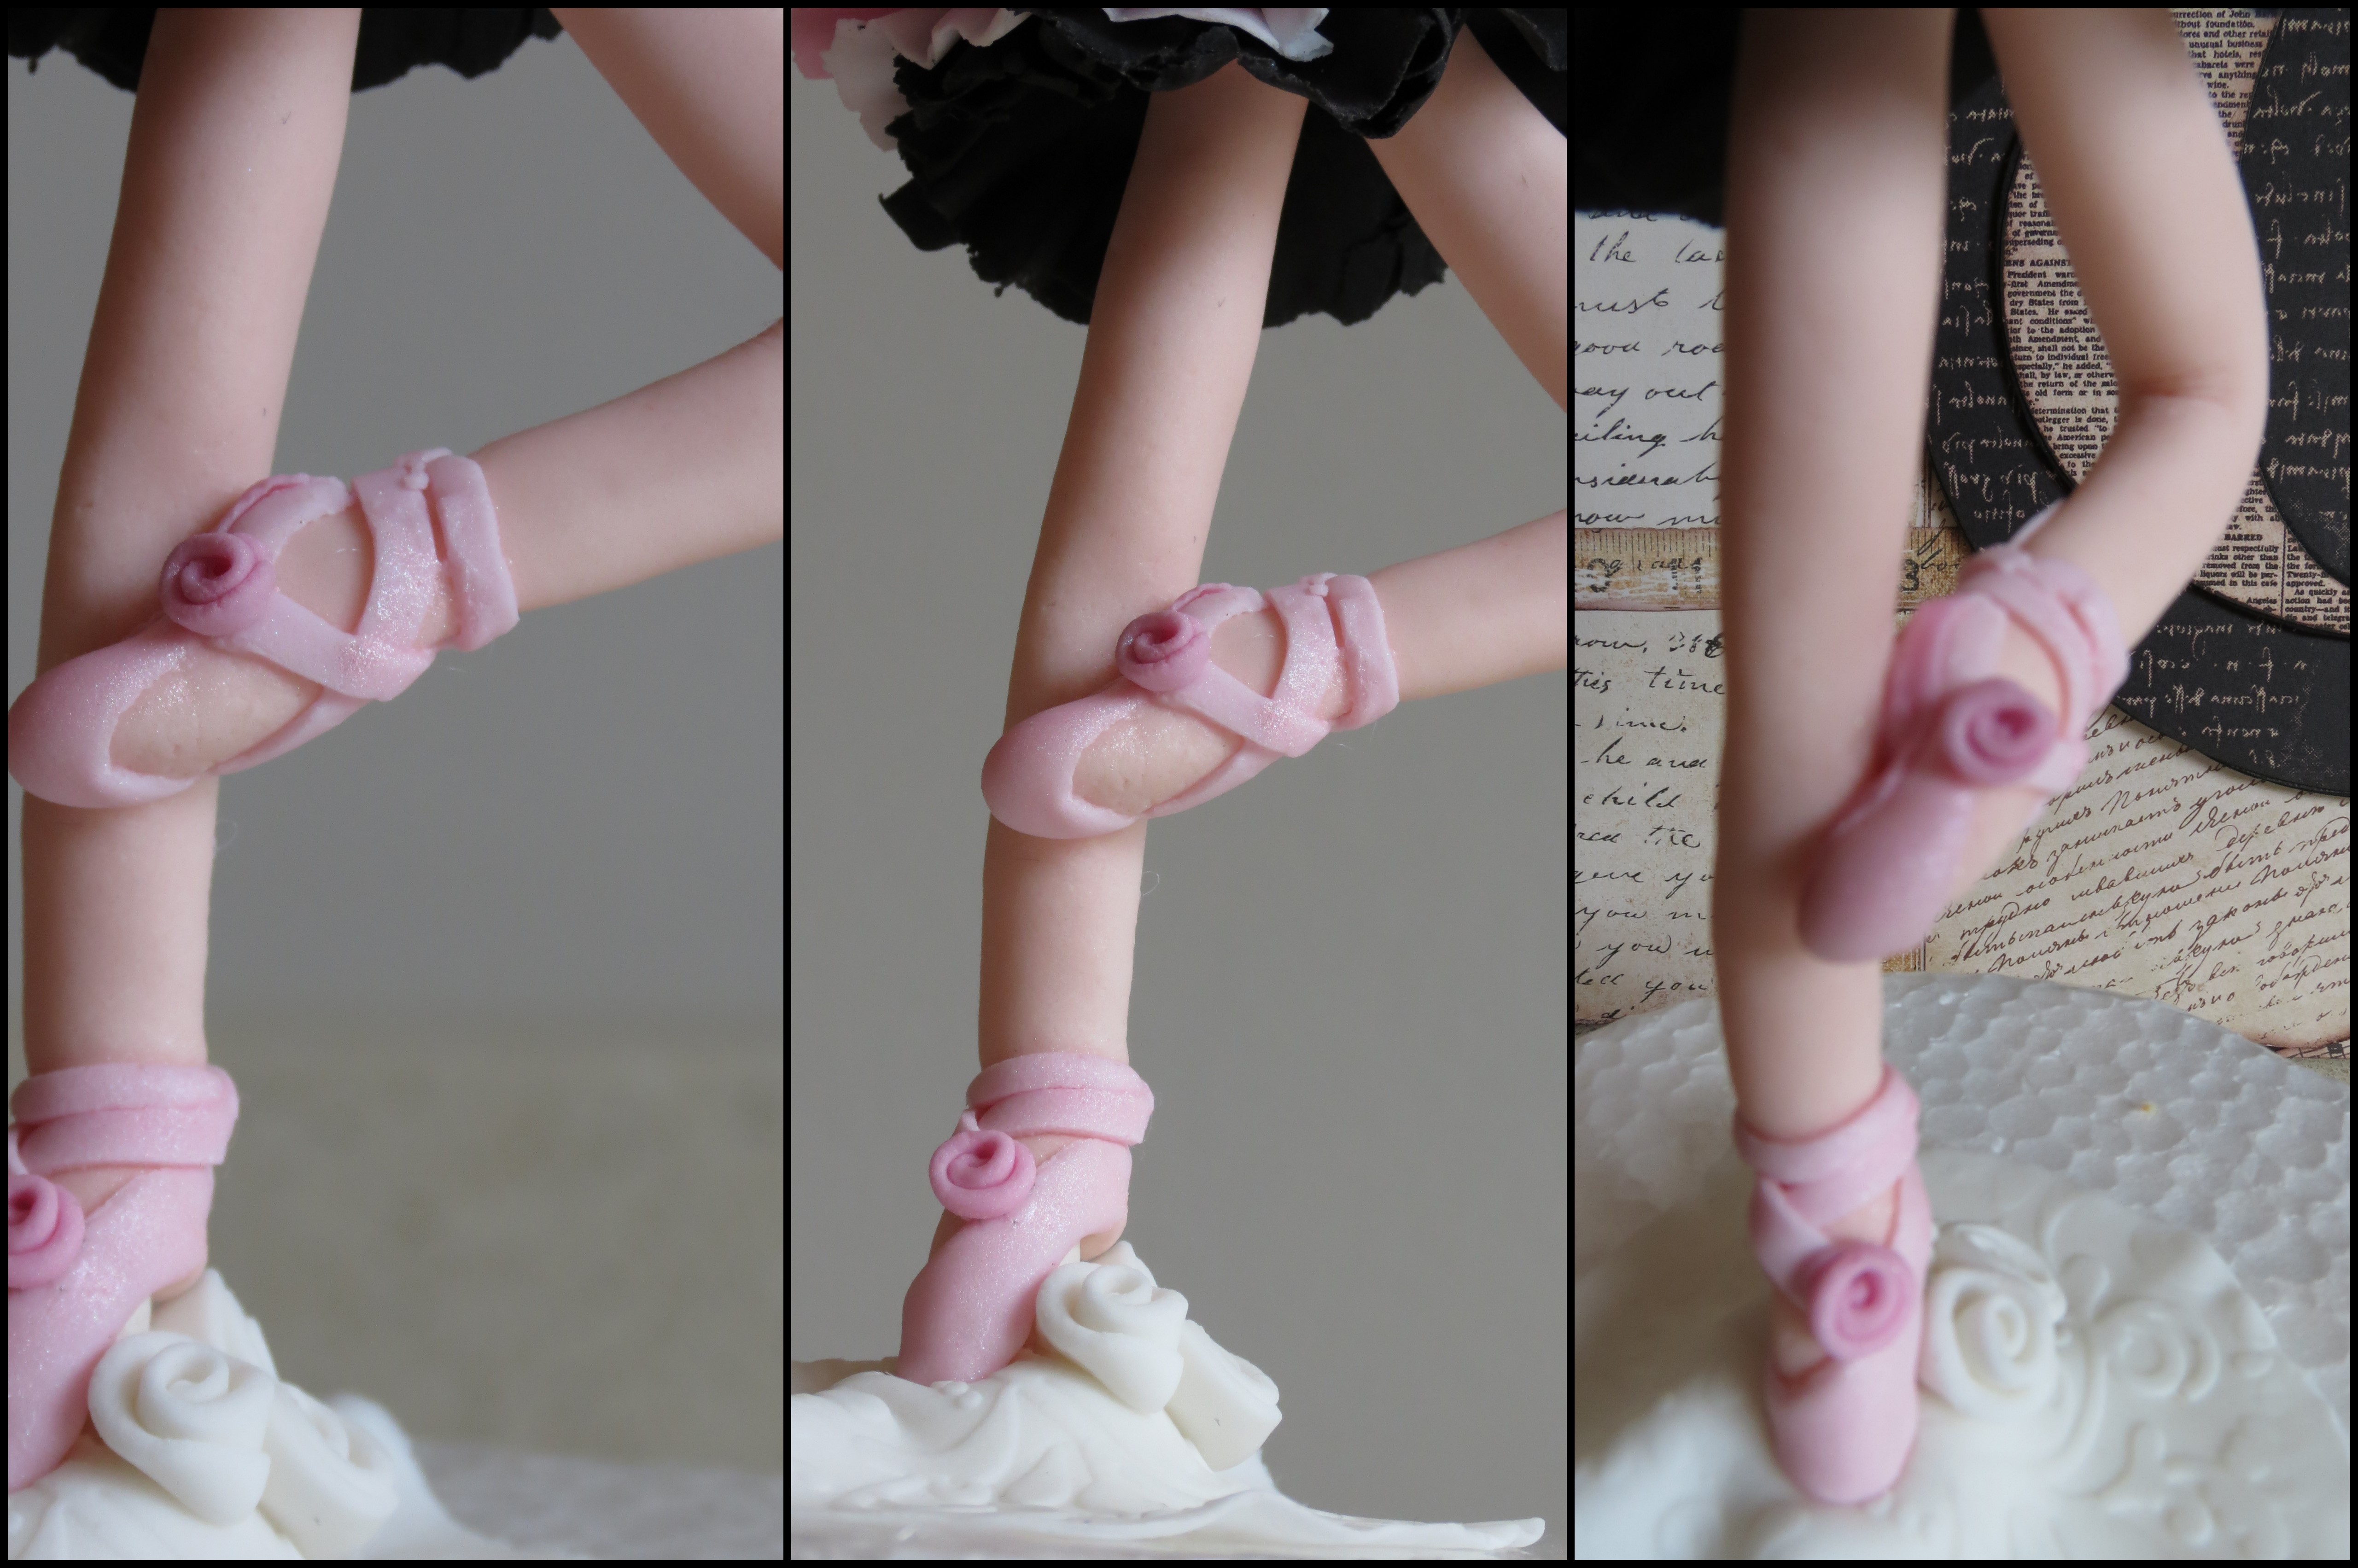
After Grace had taught us how to add the correct amount of CMC to our sugar paste we carefully added colour to our white paste to get a perfectly pale skin colour for our ballerinas who Grace reminded us spent many hours inside the studio practising resulting in their pretty pink skin. We then formed our supporting leg before adding a second leg gracefully bent at the knee and resting on the supporting knee. Their perfectly pointed toes were then slipped into pink pointe shoes with dainty ribbons around the ankles. This was the first tricky bit working with such small ribbons of sugar paste that had to be neatly stuck on to their ankles. My daughter has the most gorgeous long graceful legs and a beautiful ballet point and I tried to recreate that in my sugar work below.

Act 1 … Perfectly Pointed Toes!
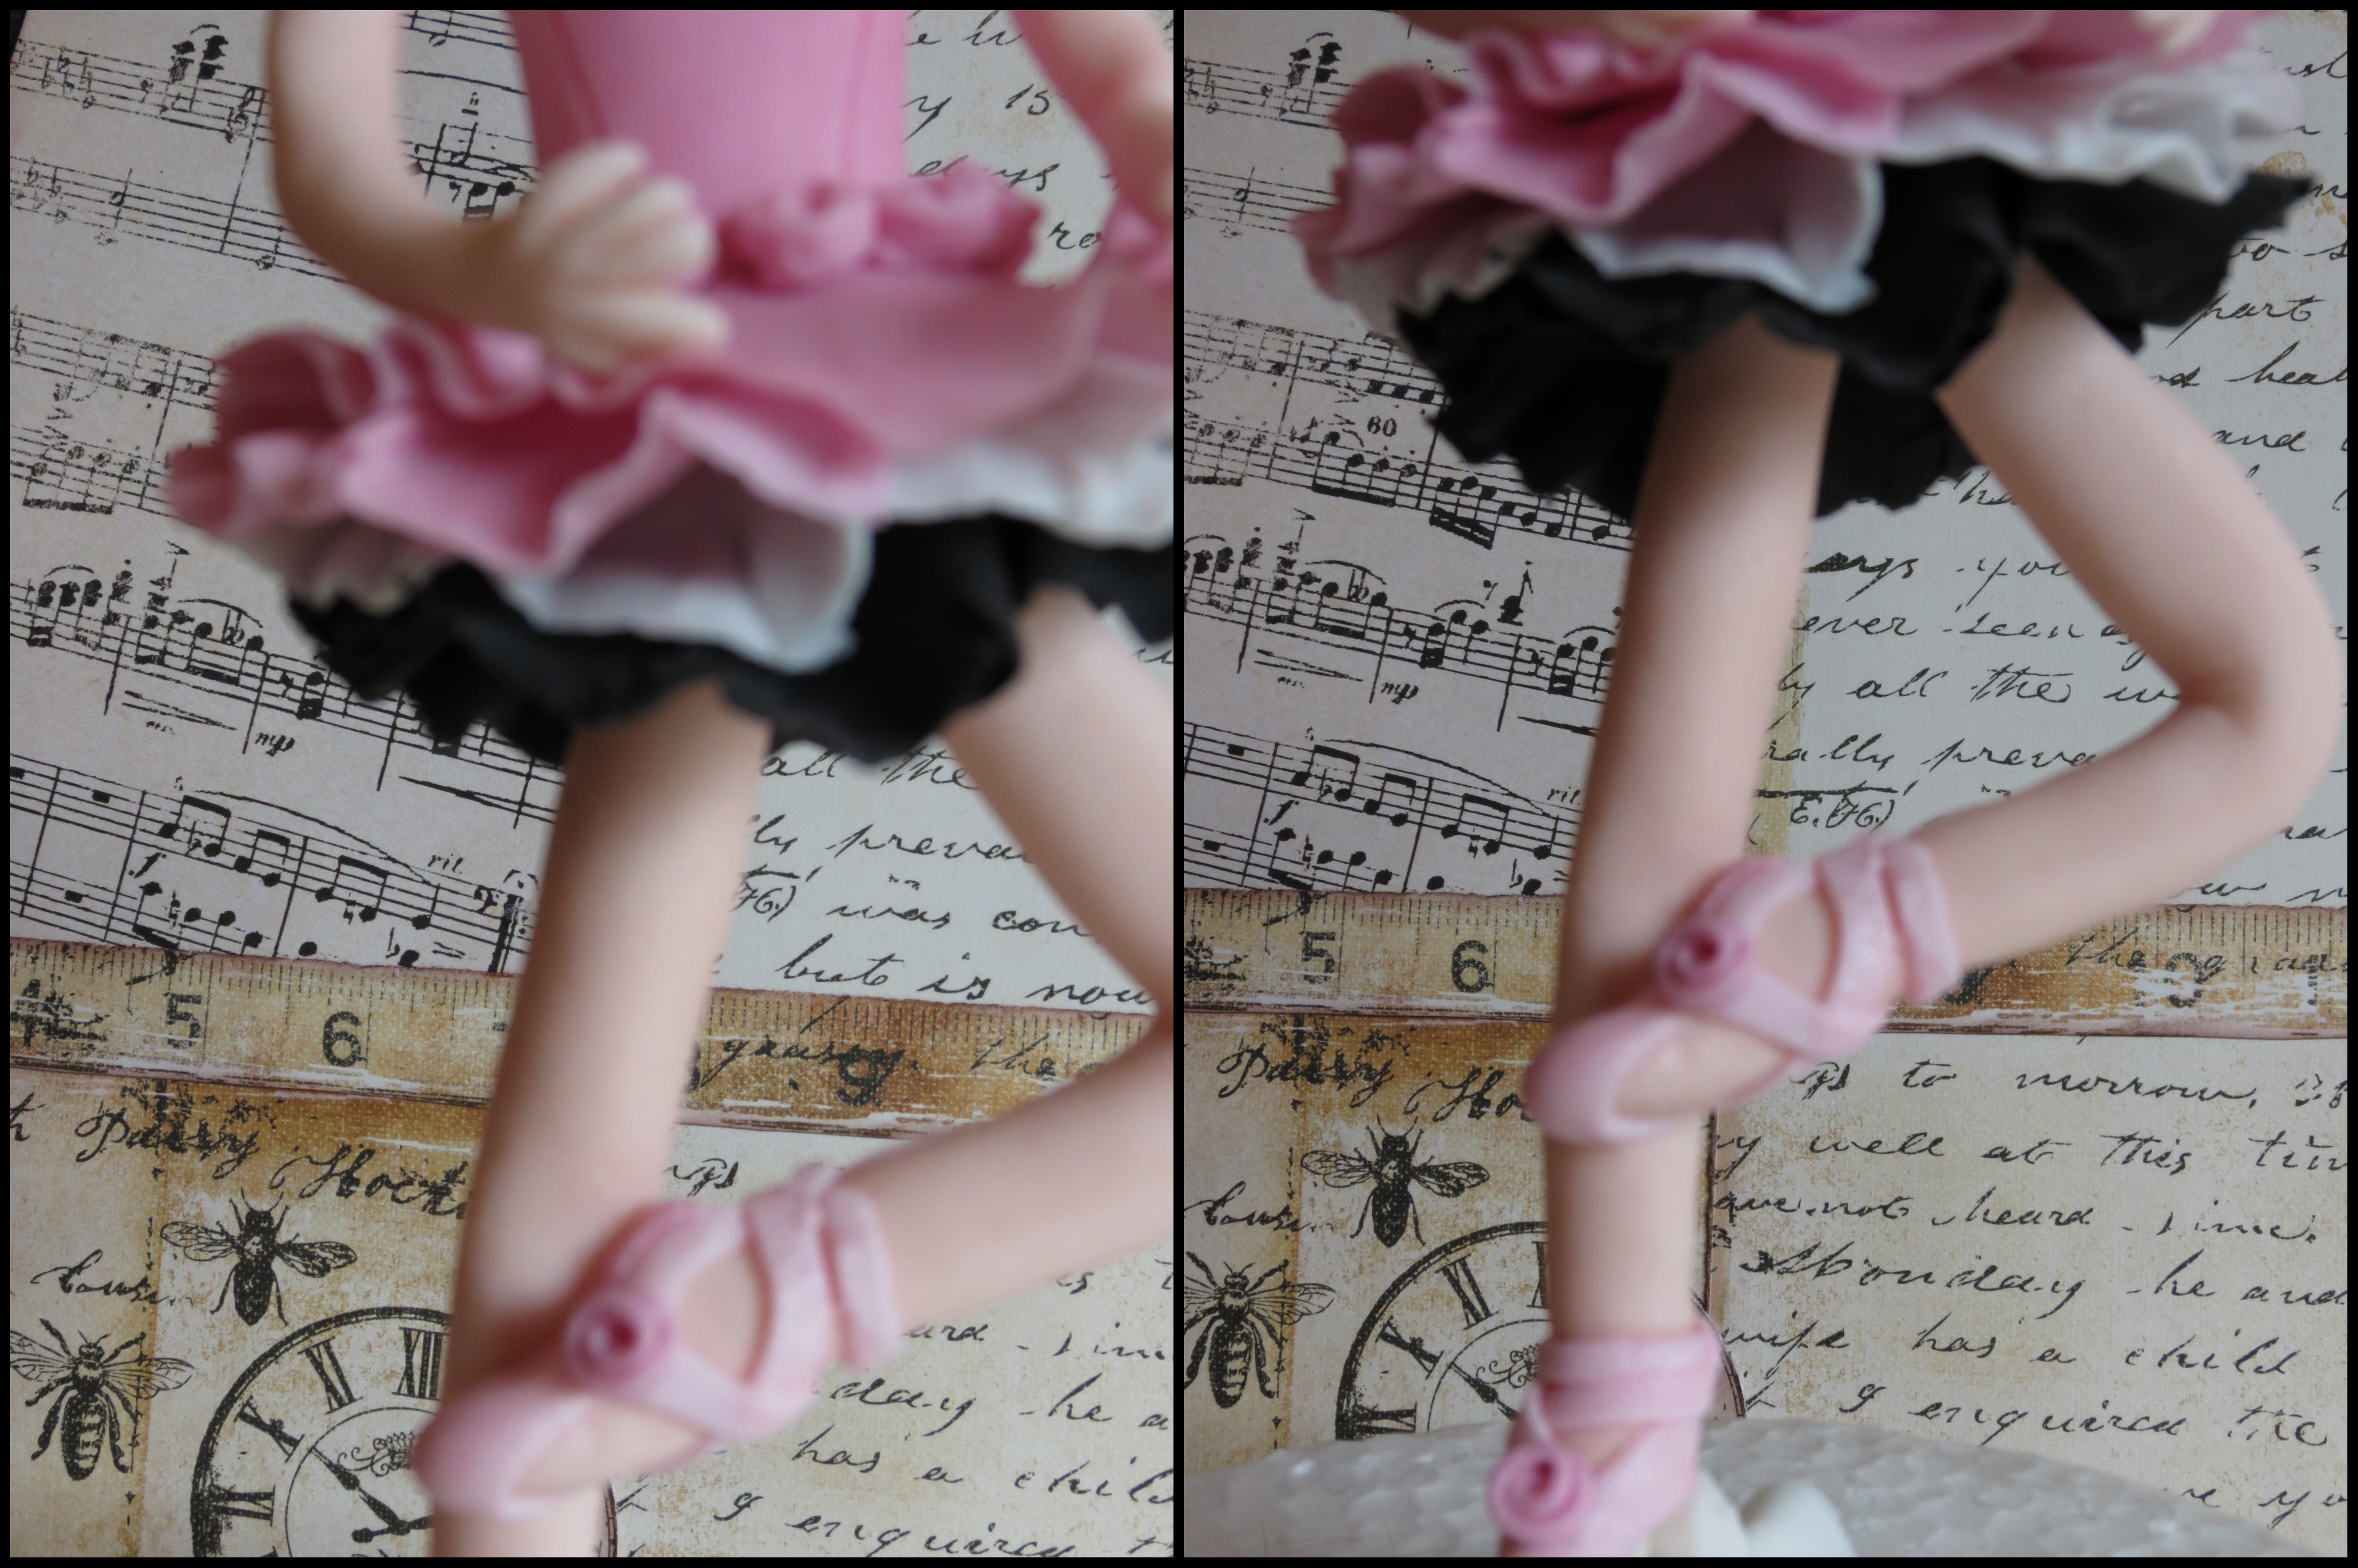
Act 2 … Twirls of Tutu!
During this Act 2 of adding frilled twirls of tutu to our ballerinas’ legs I learned that I really battle with the art of frilling a circle of sugar paste. After much frustration and many demonstrations by Grace and help from Vicci, I managed to ruffle up 3 layers of tutu as everyone sailed through 4 or more layers! I definitely had more fun photographing the tutu twirls than I did making them but I know what to practise for the next ballerina.

Act 2 … Twirls of Tutu!
Act 3 … Creatively Choreographing her Core!
Grace deftly showed us a tiny waisted body for our ballerinas and we had loads of giggles as these bodies went on to our figurines as then came the careful art of balancing the body and getting our figurines to hold their cores tight so that they would not fall too far forwards or backward. We added our embellishments in the form of bodice markings and straps, roses or glitter to our bodies once we had added her slim arms gently resting on her tutu.

Act 3 … Creatively Choreographing her Core!
Act 4 … A Whimsical Face and Wisps of Ballerina Hair!
Grace teaches the most whimsical faces for her characters and it was these little faces we added after a lunch, coffee and chat interval. Tiny eyes, nose, eyebrows and eyelashes finished the stage look before we added wisps of sugar paste hair worked into a neat bun. As you can see my figurine was well adorned with rolled pink roses but she seems really pleased with her overall look for her debut.

Act 4 … A Whimsical face & Ballerina Wisps of hair!
Act 5 … En Pointe and On Time for her Debut!
We all did well finishing on time and even managed to get a few photos of all our ballerinas together in the dimming Joburg light before we carefully transported our creations home to show off to family and friends. We were all really chuffed at what we had accomplished and in awe of Grace and her ability to teach us a tricky figurine, share stories and laugh with us all in just 1 day. I couldn’t resist these photos of my completed ballerina with her sweet smile and graceful pose … she looks perfectly primed for her debut on any cake and ready to show off her pretty new sugar tutu! Thanks Grace for another fabulous and totally fun class.

Act 5 … En Pointe & On Time for her Debut!