Archives

Beach Themed Bridal Shower Dessert Table

Staying with sunny beach days, a perfect time to blog this beautiful Beach Themed Bridal Shower organized by Wendy for her daughter, Ashleigh. This was a pretty and perfect celebration for the women in Ashleigh’s life just before she began her married adventure. A great way to start in a gorgeous setting with bachelorette fun and games, delicious food and a fancy carefree array of turquoise and white sweet treats.

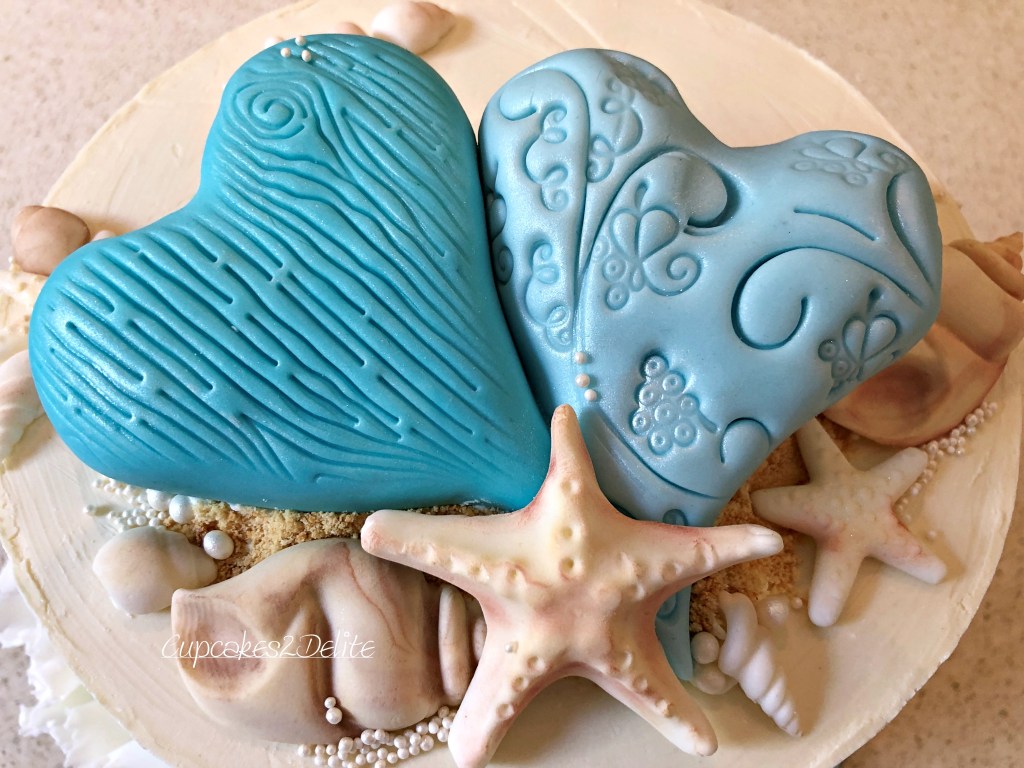
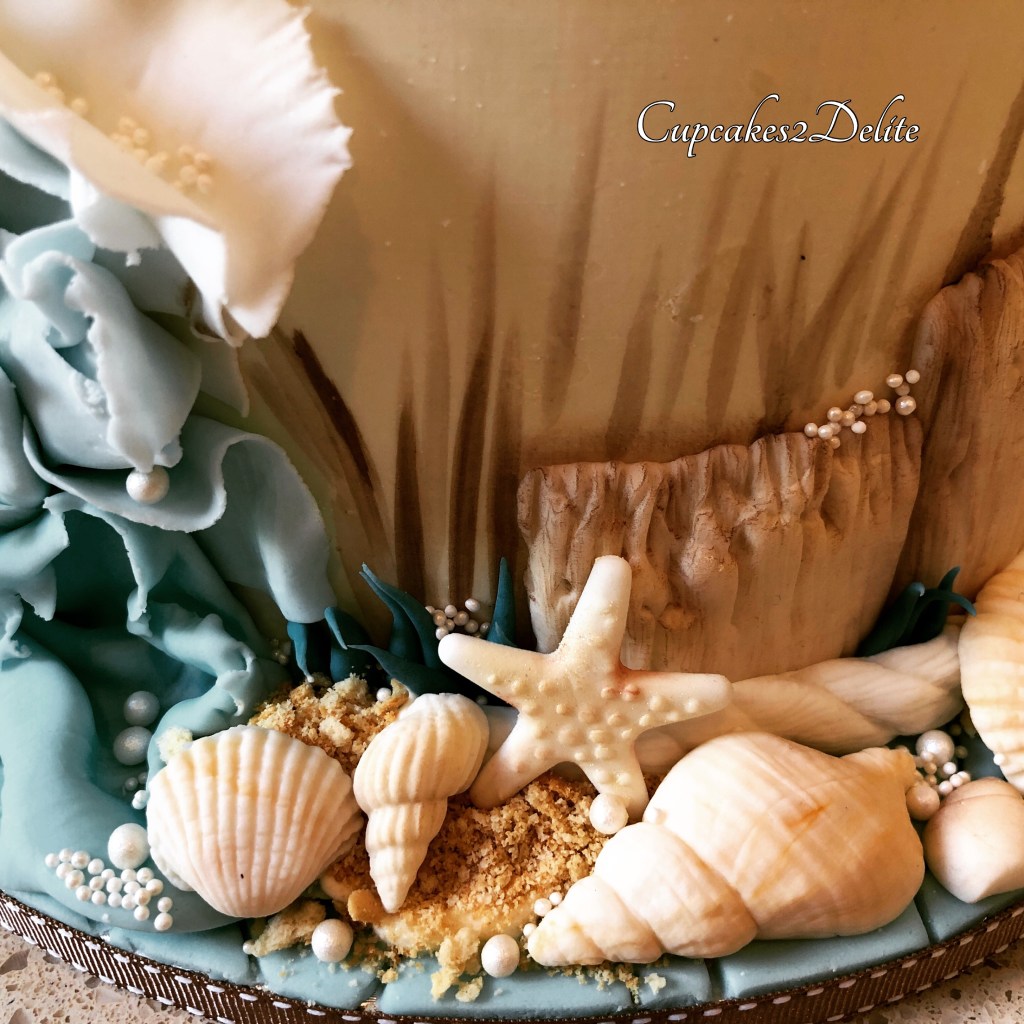
The cake was layers of rich vanilla sponge and passion fruit buttercream that I covered in an elegant Geldhof white chocolate ganache. Driftwood, larger shells and rope detail I made by moulding sugar paste into Karen Davies Driftwood and Shell Mould. The smaller shells were moulded using Fondant Solutions Mould. I had an idea to use thin strips of turquoise and white sugar paste as waves kissing the side of the cake with crushed biscuit ‘sand’ & tiny cream pearls for water bubbles. My favourite part are the 2 hand-moulded embossed hearts representing the young lovers who celebrated their engagement on the beach.

Pastel turquoise macaron shells filled with a wave of Flavour Nation naartjie white chocolate ganache and Callebaut white Crispearls and decorated with a royal icing wave, sprinkles of golden sugar ‘sand’, white ‘water droplet’ beads and a sugar paste shells were such a pretty addition to the cake order.

Swirls of white and turquoise meringue kisses in Mixed Berry Flavour with turquoise and white beads and sea themed sprinkles were another tasty addition to the dessert table.
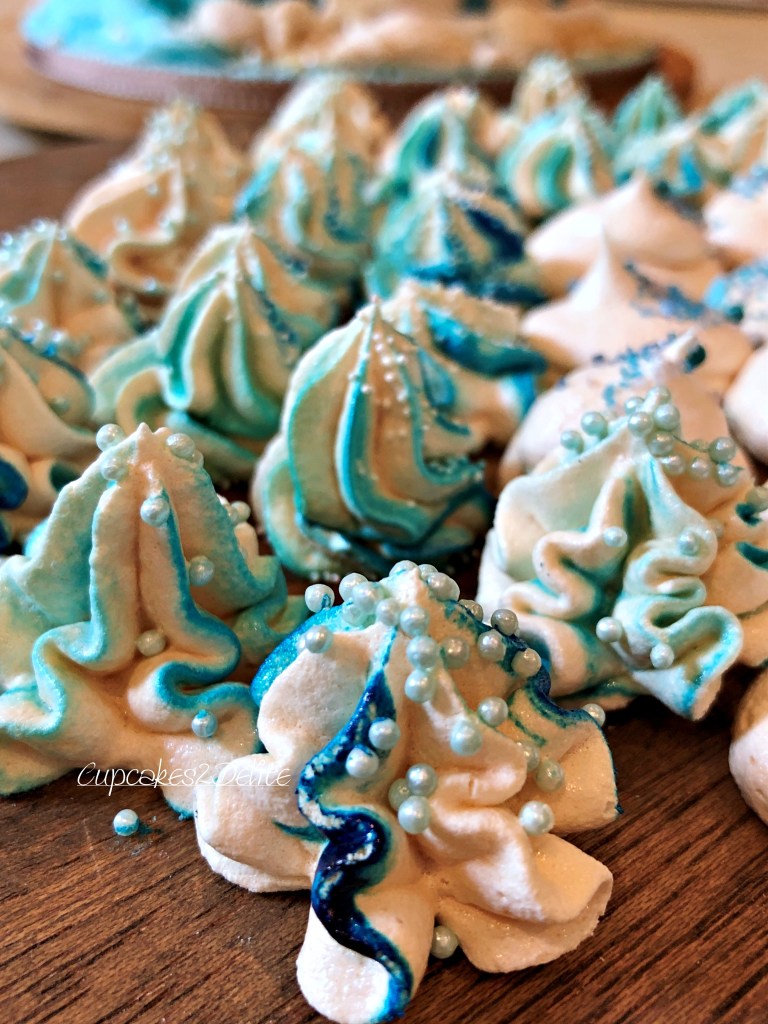
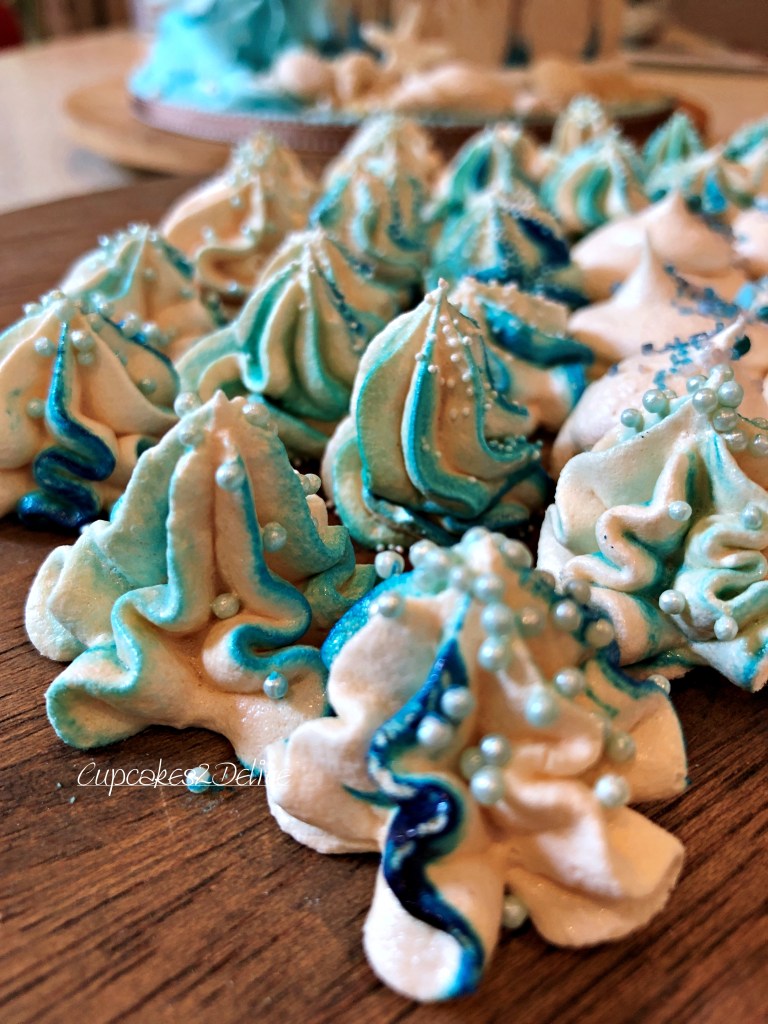
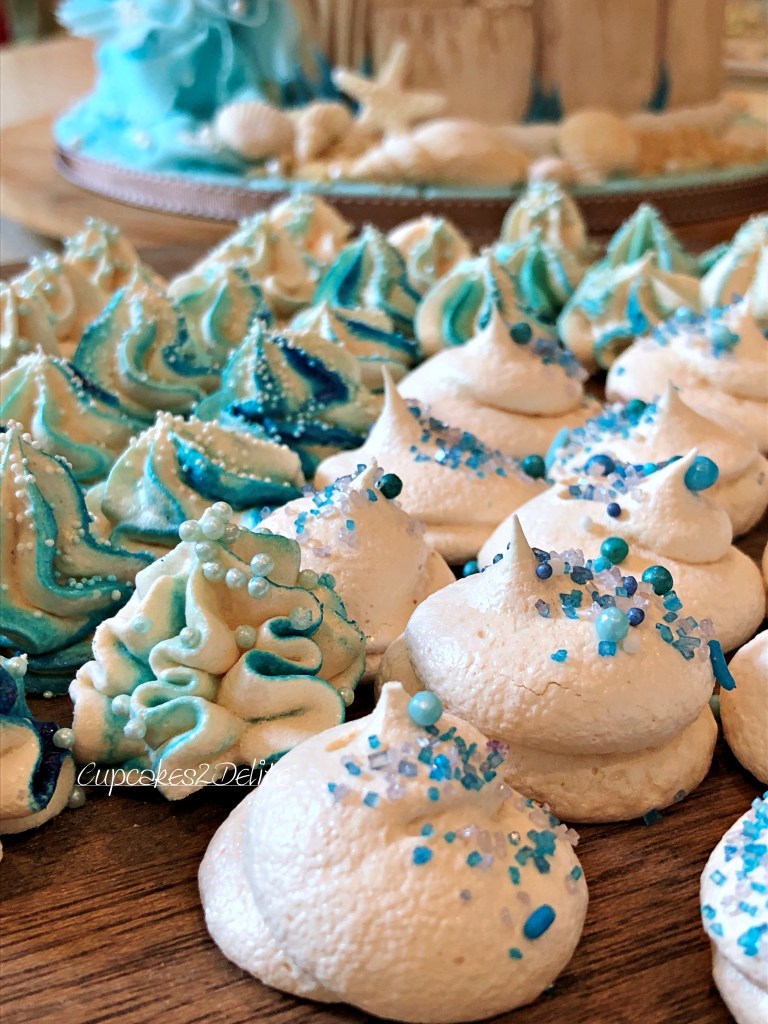
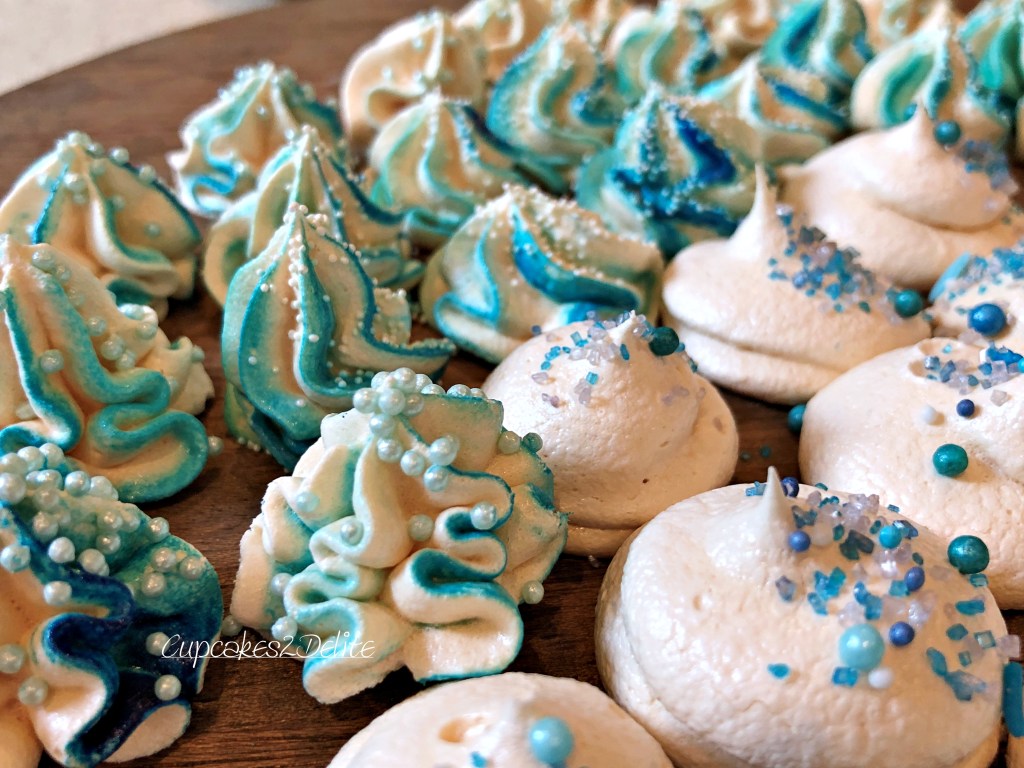
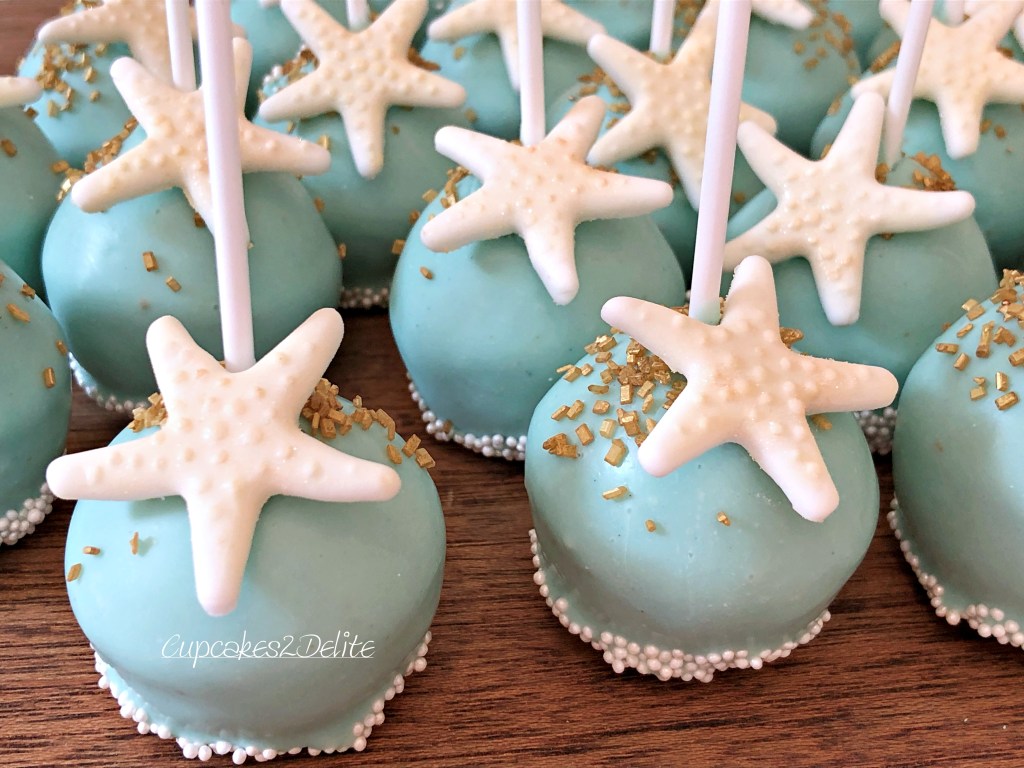
Ice-cream flavoured, star fish adorned cake pops and sea jellies I made using grapetizer, crushed biscuits again for ‘sand’, crispearls and chocolate ganache filled shells, sat sweetly (excuse the pun) amidst other turquoise and white sweet delights to complete a stunning Beach Themed Bridal Dessert Table.

Thank you Wendy for all the hours and effort you put into the planning for this beautiful celebration for Ashleigh and her friends. Thank you for being such a loyal and enthusiastic friends and client.

Wendy – Ashleigh’s Bridal Shower, February 2019

“The very best tasting and most stunning bridal shower cake ever. You depicted the beach theme so well Lisa Cunningham. Not just the cake but macarons, meringues and cake pops all absolutely incredible. You are soo talented.”

Advertisement

Rose Fairy Tutorial

Rose Fairy -Cupcakes2Delite

This petite Rose Fairy was a figurine I made for a specially requested figurine class.

I thought I would share the tutorial with you here in this blog post.

She is a character figurine, so not anatomically perfect but totally sweet in her rose petal dress and rose leaf bodice & boots.

Rose Fairy -Cupcakes2Delite

I hope you have fun trying out this sweet character & let me know how you get on or if you have suggestions for any other tutorials

Rose Fairy -Cupcakes2Delite
Rose Fairy -Cupcakes2Delite Tutorial 1

1. Colour 100g fondant (Premium or Bakels) ivory (no cmc added)

2. Roll out your ivory fondant and cover a 7 inch thick cake board, emboss with stone embossing mat

3. Select stone colour dusting powders

4. I used Rolkem Cappucino and Terracotta

5. Lightly dust first with the lighter colour (Cappuccino)

6. Dust into the grooves & edges of your board with the darker colour (Terracotta)

7. Colour 130g fondant coral or any colour to suit your fairy (add 1.5ml cmc)

8. Push the coral fondant into your rose mould (siliko rose mould).  I pushed a 3cm polystyrene ball into the paste in the mould to make the rose a bit lighter in weight.  You can also create a tree trunk or rock for your fairy to sit on.

9. I used Rolkem Watermelon dust to dust the rose

10. Stick your rose onto your cake board using edible cmc glue or royal icing and have your tools ready to create your fairy.

Colour 140g Zeelandia paste a flesh colour.  Add 3 ml cmc and work in well.

The paste is easier to use if allowed to settle a few hours or overnight.

You will have left over paste but I always mix up more flesh than I need in case I need to re-roll a limb or redo the head.

11. Legs (12g each) roll into 2 x 12g balls

12. Roll each ball into an approx. 8cm tapered sausage

13. Cut off at an angle a small amount of paste from the thin tapered end using a sharp knife

14/16 Roll this tapered end to form the foot and then gently pull up heel.  Using your figure gentle roll the back of the knee

15/17 Fold the leg into a right angle for a sitting figurine and pull out paste to form the knee.

18. Glue the 2 legs in position on your rose

19. Roll 24 g of paste into a ball, then into an elongated teardrop.  From the large rounded ended ease paste to form a kneck

20. Using shaping tools form the bust line (if this fairy is for a child this does not need to be done)

21. Twist a support skewer through the fairy torso from the kneck down and insert the skewer into the rose so that the torso fits onto the fairy’s legs.

22. Dress your fairy using rose petal leaves that have been embossed and edges softened and curled.  Add rose leaf boots

23/24/25. Create the bodice using rose leaves.  Let smaller rose leaves fall over the skirt

26.  Roll 2 x 5g flesh coloured balls into tapered sausages

27. Roll thinner end of tapered sausage to form wrist and hand

28. Cut out thumb and then divide remaining pad into 4 using a sharp knife, roll to round thumb and fingers. Roll out to thin paste at the elbow and gently fold to form the elbow

29/30. Glue arms using edible cmc glue to the fairy torso & dress the shoulders with leaves/straps. Dust the petals and leaves to highlight the edges

I have added the head in this sequence but would recommend making the head first in order for it to dry before adding the eyes and dusting detail.

31. Roll 20g flesh coloured paste into a ball and then gently roll to indent the centre of your ball.  You can also shape the chin at this stage.

32. Indent eyes, nose and cut for the mouth

33. Shape eyeshadow recess and slightly open the mouth

34. Using a balling tool make an indentation either side of the mouth line

35. Using fingers, shapers and small balling tools, shape the lips

36. Using shapers and balling tools, shape the nose and make nostrils

37. Insert small balls of white fondant for the eyeballs.  Cut out 2 irises from fondant using icing nozzles and glue to the white. Do the same but smaller in black for the pupils.  Carefully dust around the irises in black. Dust apricot into the recesses and shape of the nose and lips and eyes. Complete the eye using brown to dust eyeliner and black for a deeper eye line

38. Trim the skewer to size to attach the head and add cmc edible glue to the skewer.  Gently add the head onto the stick making sure not to squash the face.

39. Now the hair and final details can be added to your figurine.

40. Take a step back and admire your beautiful fairy and at this step you are fully entitled to do a little happy dance!

Andre Sonnekus Photography …………Blair & Duncan’s Wedding Cake

Blair & Duncan Wedding - Andre Sonnekus Photo

Photograph – Courtesy of Andre Sonnekus Photography

The inspiration for Blair & Duncan’s Macaron Tower Wedding Cake was an Autumn Sunset Colour Palette. The story behind this cake is captured in my previous blog post. This post is to pay tribute to the magicians behind this wedding. We know that Blair magically captured Duncan’s heart before they began to plan a wonderful August wedding in Johannesburg. They chose as their wedding venue, the picturesque Memoire Wedding Venue.

Blair & Duncan Wedding - Andre Sonnekus Photo

Photo Courtesy of Andre Sonnekus Photography 

Truly the most exquisite wedding bouquet I have ever seen created by Carol Anne Frey and then so perfectly photographed by Andre here.  These colours were the inspiration for Blair and Duncan’s Wedding Cake and Macaron Tower. I could not have asked for a more exciting colour combination. Carol Anne, your passion and love for flowers is captured so beautifully in this bouquet you so lovingly created for Blair and your  talent shows in your attention to every detail in the planning and decor for this wedding.

Blair & Duncan Wedding - Andre Sonnekus Photo

Photograph – Courtesy of Andre Sonnekus Photography

Blair & Duncan Wedding - Andre Sonnekus Photo

Photograph – Courtesy of Andre Sonnekus Photography

A huge thank you to Rebecca from The Crazy Lemon for this perfectly cut perspex cake topper. You were able to replicate the B & D initials exactly as they were printed on the wedding invitation. I gave them a quick coat of paint on the back and voila we had the matching colour.

Wedding Cake - Blair & Duncan

I love how Andre got close up and personal here with my macarons capturing each colour tier …..

Blair & Duncan's Macaron Tower - Andre Sonnekus Photo

Photograph – Courtesy of Andre Sonnekus Photography

Blair & Duncan's Macaron Tower - Andre Sonnekus Photo

Photograph – Courtesy of Andre Sonnekus Photography

Blair & Duncan's Macaron Tower - Andre Sonnekus Photo

Photograph – Courtesy of Andre Sonnekus Photography

As usual Flavour Nation provided the awesome flavours that went into each macaron filling.

And of course the awaited cutting of the cake ….

Photographs courtesy of Andre Sonnekus Photography 

I couldn’t have been asked to be part of a more gorgeous wedding than this and it was a pleasure to work with both Blair and her wedding planner, Carol Anne.

Thank you Blair for these kind words of thanks:

” Lisa, where do I begin! Thank you for the amazing cake and macarons. Everyone commented on how delicious they were, and they disappeared in no time. It looked so stunning, absolutely beyond our expectations.”

                                      Photographs courtesy of Andre Sonnekus Photography

Blair & Duncan’s Wedding Cake & Macarons

Wedding Cake - Blair & Duncan

Sitting in a warm coffee shop in a freezing cold London in Dec 2017 together with Blair was the first I heard of Blair’s plans for her wedding back in Johannesburg. What a contrast to the beautiful August day a few months later that Blair and Duncan shared for their wedding here in South Africa with family and friends. When Blair mentioned a cupcake tower for her wedding cake, I had only tried macarons a few times and had given a few classes and demos on how to make them. As Blair was adamant I was making her cake, I set out to perfect these tiny (often troublesome) bites of deliciousness.

Wedding Cake - Blair & Duncan

My inspiration was Blair’s choice of an Autumn Sunset colour palette and Carol Anne’s meticulous planning of every detail of this wedding & her choice of flowers that would bring to life the colour palette. The result was a colourful ombre macaron tower topped with the wedding cake with an array of sugar paste flowers. The final flourish was the B & D initial topper cut by Rebecca at The Crazy Lemon to match the initials on the wedding invitation. I painted the back of the clear cut initials to match the invite colour.

Wedding Cake - Blair & Duncan

I chose to make  a peachy coral rose, yellow and purple ranunculus and white sweet peas to top the white fondant cake.

The macarons in the matching colours were from top to bottom; blue – Flavour Nation Hazelnut, purple – Flavour Nation Grape, berry – Flavour Nation Mixed Berry, peach – Flavour Nation Naartjie and mustard – Flavour Nation Passion Fruit. Huge thanks to Andre Sonnekus who photographed the macarons so beautifully. More of the perfect moments Andre captured will be featured in my next post.

Thank you again Blair for the opportunity to be part of your wedding day in such a special and colourful way!

Blair & Duncan's Macaron Tower - Andre Sonnekus Photo

Photograph – Courtesy of Andre Sonnekus Photography

Blair & Duncan's Macaron Tower - Andre Sonnekus Photo

Photograph – Courtesy of Andre Sonnekus Photography

Blair & Duncan's Macaron Tower - Andre Sonnekus Photo

Photograph – Courtesy of Andre Sonnekus Photography


Basset Wedding Couple

Basset Wedding Couple Cake Topper

These 2 sugar Bassets completely stole my heart and it was hard to let them go on their merry way to celebrate a wedding. This is another story where my client, Nicole, asked me to make a Basset Wedding Couple in sugar for her sister’s wedding. Not being a natural at creating animals, I was hesitant to accept the order and then not be able to capture the cute spirit of the 2 bassets in the photograph Nicole sent me. With my client’s faith in me, I hand modeled these 2 characters and finished the shy but pretty bride basset with her rose lace veil and her dashing groom with his top hat and jacket. Thanks Nicole for allowing me to breath some sugar life into your family bassets for such a beautiful wedding.

Basset Wedding Couple Cake TopperBasset Wedding Couple Cake TopperBasset Wedding Couple Cake TopperBasset Wedding Couple Cake TopperBasset Wedding Couple Cake TopperBasset Wedding Couple Cake TopperBasset Wedding Couple Cake TopperBasset Wedding Couple Cake Topper

Bikini Girl Figurine for Erin

Bikini Girl Figurine

Erin chose this cute sugar paste figurine in a bikini to add to the Beach themed cake her granny was making for her 13th birthday.  Using my trusted Saracino modelling paste, I modelled a sugar version of Erin with gorgeous strawberry blonde sugar hair, gorgeous smile and pretty eyes framed with a sprinkling of sun kissed freckles. No beach girl is complete without a colourful towel to sit elegantly on so out came my embossing tools to create the lime green towel for the dainty figurine.

Bikini Girl Figurine

It was brilliant to hear you had such a fun party Erin and thanks Darryn for the photos of the completed cake with the bikini girl figurine.

Bikini Girl FigurineBikini Girl FigurineBikini Girl Figurine