Tag Archive | Sugar Paste Figurine

Rose Fairy Tutorial

Rose Fairy -Cupcakes2Delite

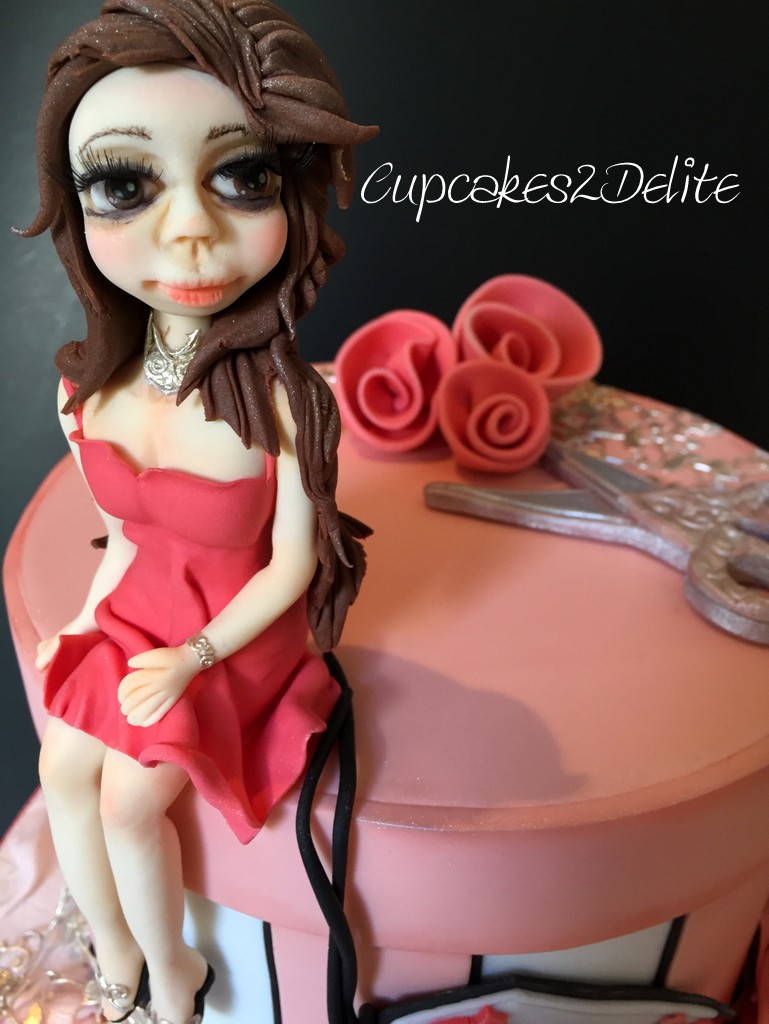
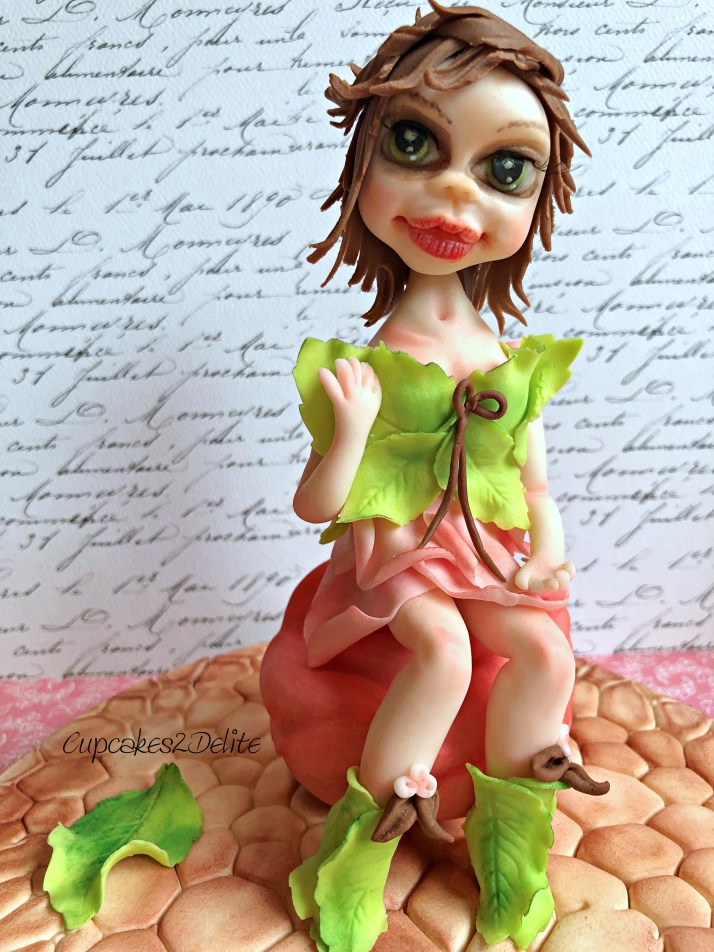
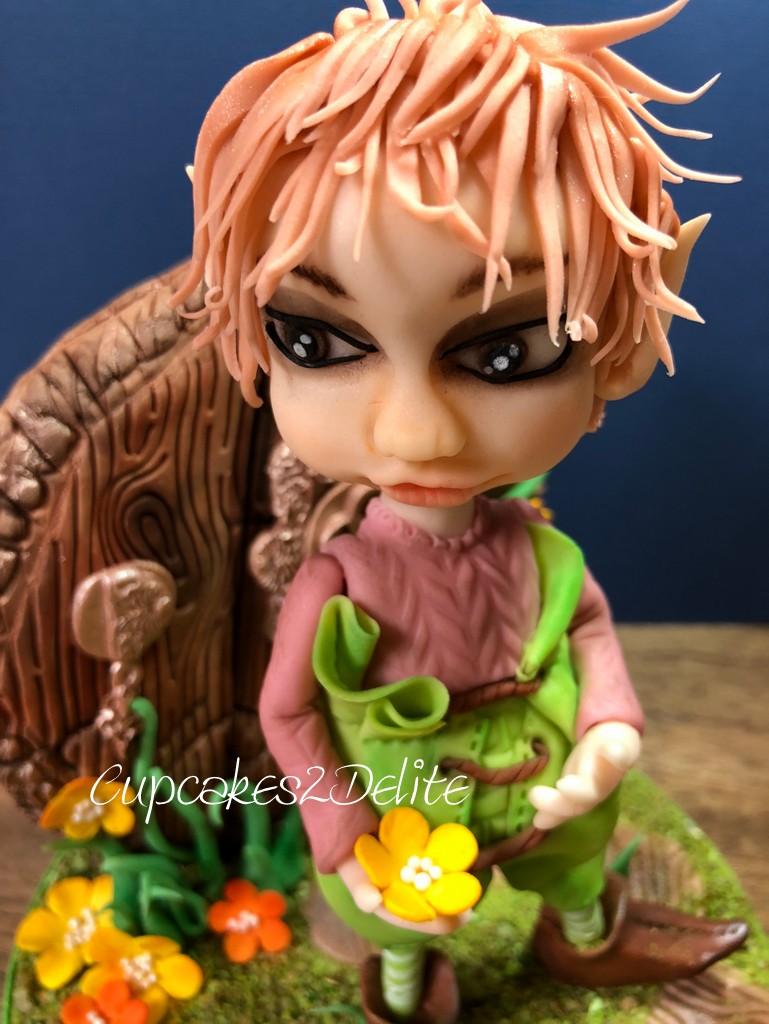
This petite Rose Fairy was a figurine I made for a specially requested figurine class.

I thought I would share the tutorial with you here in this blog post.

She is a character figurine, so not anatomically perfect but totally sweet in her rose petal dress and rose leaf bodice & boots.

Rose Fairy -Cupcakes2Delite

I hope you have fun trying out this sweet character & let me know how you get on or if you have suggestions for any other tutorials

Rose Fairy -Cupcakes2Delite
Rose Fairy -Cupcakes2Delite Tutorial 1

1. Colour 100g fondant (Premium or Bakels) ivory (no cmc added)

2. Roll out your ivory fondant and cover a 7 inch thick cake board, emboss with stone embossing mat

3. Select stone colour dusting powders

4. I used Rolkem Cappucino and Terracotta

5. Lightly dust first with the lighter colour (Cappuccino)

6. Dust into the grooves & edges of your board with the darker colour (Terracotta)

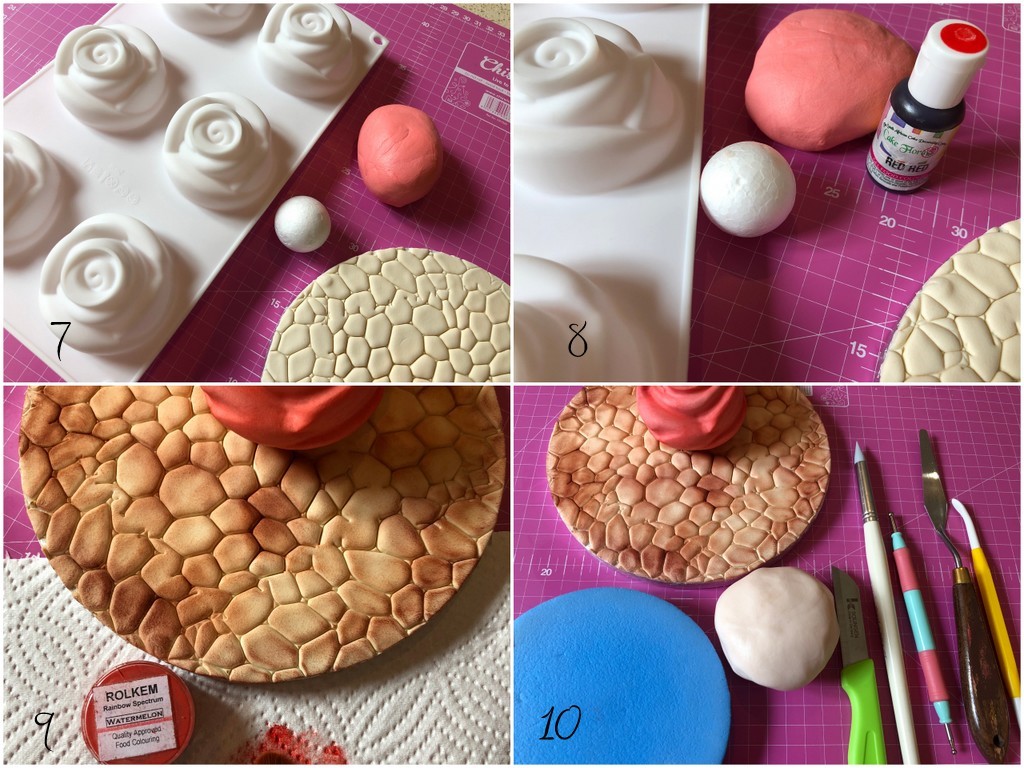
7. Colour 130g fondant coral or any colour to suit your fairy (add 1.5ml cmc)

8. Push the coral fondant into your rose mould (siliko rose mould).  I pushed a 3cm polystyrene ball into the paste in the mould to make the rose a bit lighter in weight.  You can also create a tree trunk or rock for your fairy to sit on.

9. I used Rolkem Watermelon dust to dust the rose

10. Stick your rose onto your cake board using edible cmc glue or royal icing and have your tools ready to create your fairy.

Colour 140g Zeelandia paste a flesh colour.  Add 3 ml cmc and work in well.

The paste is easier to use if allowed to settle a few hours or overnight.

You will have left over paste but I always mix up more flesh than I need in case I need to re-roll a limb or redo the head.

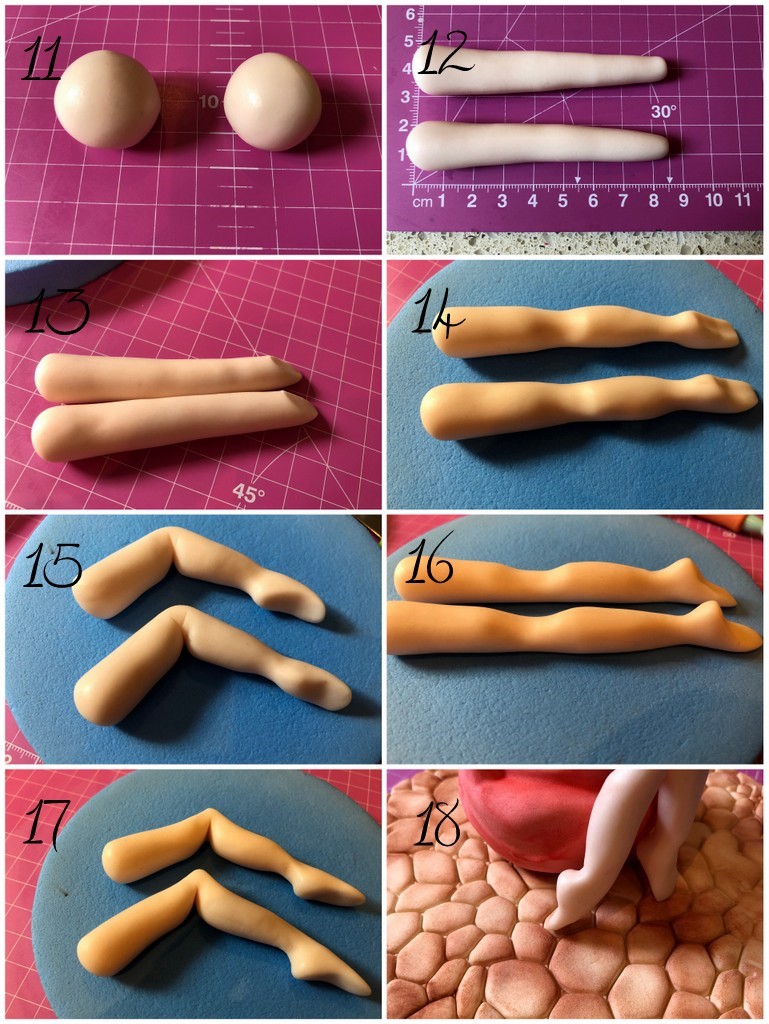
11. Legs (12g each) roll into 2 x 12g balls

12. Roll each ball into an approx. 8cm tapered sausage

13. Cut off at an angle a small amount of paste from the thin tapered end using a sharp knife

14/16 Roll this tapered end to form the foot and then gently pull up heel.  Using your figure gentle roll the back of the knee

15/17 Fold the leg into a right angle for a sitting figurine and pull out paste to form the knee.

18. Glue the 2 legs in position on your rose

19. Roll 24 g of paste into a ball, then into an elongated teardrop.  From the large rounded ended ease paste to form a kneck

20. Using shaping tools form the bust line (if this fairy is for a child this does not need to be done)

21. Twist a support skewer through the fairy torso from the kneck down and insert the skewer into the rose so that the torso fits onto the fairy’s legs.

22. Dress your fairy using rose petal leaves that have been embossed and edges softened and curled.  Add rose leaf boots

23/24/25. Create the bodice using rose leaves.  Let smaller rose leaves fall over the skirt

26.  Roll 2 x 5g flesh coloured balls into tapered sausages

27. Roll thinner end of tapered sausage to form wrist and hand

28. Cut out thumb and then divide remaining pad into 4 using a sharp knife, roll to round thumb and fingers. Roll out to thin paste at the elbow and gently fold to form the elbow

29/30. Glue arms using edible cmc glue to the fairy torso & dress the shoulders with leaves/straps. Dust the petals and leaves to highlight the edges

I have added the head in this sequence but would recommend making the head first in order for it to dry before adding the eyes and dusting detail.

31. Roll 20g flesh coloured paste into a ball and then gently roll to indent the centre of your ball.  You can also shape the chin at this stage.

32. Indent eyes, nose and cut for the mouth

33. Shape eyeshadow recess and slightly open the mouth

34. Using a balling tool make an indentation either side of the mouth line

35. Using fingers, shapers and small balling tools, shape the lips

36. Using shapers and balling tools, shape the nose and make nostrils

37. Insert small balls of white fondant for the eyeballs.  Cut out 2 irises from fondant using icing nozzles and glue to the white. Do the same but smaller in black for the pupils.  Carefully dust around the irises in black. Dust apricot into the recesses and shape of the nose and lips and eyes. Complete the eye using brown to dust eyeliner and black for a deeper eye line

38. Trim the skewer to size to attach the head and add cmc edible glue to the skewer.  Gently add the head onto the stick making sure not to squash the face.

39. Now the hair and final details can be added to your figurine.

40. Take a step back and admire your beautiful fairy and at this step you are fully entitled to do a little happy dance!

Advertisement

Bikini Girl Figurine for Erin

Bikini Girl Figurine

Erin chose this cute sugar paste figurine in a bikini to add to the Beach themed cake her granny was making for her 13th birthday.  Using my trusted Saracino modelling paste, I modelled a sugar version of Erin with gorgeous strawberry blonde sugar hair, gorgeous smile and pretty eyes framed with a sprinkling of sun kissed freckles. No beach girl is complete without a colourful towel to sit elegantly on so out came my embossing tools to create the lime green towel for the dainty figurine.

Bikini Girl Figurine

It was brilliant to hear you had such a fun party Erin and thanks Darryn for the photos of the completed cake with the bikini girl figurine.

Bikini Girl FigurineBikini Girl FigurineBikini Girl Figurine

Retha Joubert Figurine Modelling Course

Retha Joubert Figurine Modelling Class

When Retha’s advert breezed across my facebook page, I was already hooked and intrigued as to how she had created her delicate sugar paste figurine in her beautiful printed dress.  Heidi Brukman from Kadies Bakery Supplies in Fourways offers a variety of classes and she was hosting Retha Joubert of Retha Joubert Fondant Studio who is the artist and creator of this pretty figurine. I was so excited and it was a privilege to be able to do this class of Retha’s at Kadies in April with this class being so popular. Below is Retha’s photo collage advertising this 2 day figurine modelling and edible fabric course.

Retha Joubert Figurine Modelling Course

As Heidi opened her doors that Saturday morning to her shoppers looking for their baking supplies, cake orders and advice that is always so generously offered by Heidi and her staff, the five of us enrolled in this class had already met Retha and each other and started yet another adventure in this enthralling world of sugar art. In contrast to the bustle of activity in the baking supplies world, Retha brought her quiet and organised personality into this environment and patiently demonstrated her figurine modelling skills to us. She explained and guided us through creating movement in our figurine to have her finally walking in the breeze through a meadow

Retha Joubert Figurine Modelling Class

Even in a learning environment, if you have 6 decorators together, there is the inevitable amount of chatting and sharing of ideas that go together mixed in with a good few laughs. Retha shared with us how she studied her degree in Fine Arts  and only started in the sugar art world in 2014. She was asked to do a figurine for a cake for a friend of hers and that started her love for sugar paste figurine modelling. With an interest in her figurines and her passion for teaching, Retha is now hosting classes in many different venues. All her dates for this particular class can be found on her facebook page.


Retha Joubert Figurine Modelling Class

I loved how Retha shared her knowledge gained through her love for sculpting with us  & this new, easy and innovative way to create edible fabric that dries so quickly. I couldn’t wait to photograph this gorgeous figurine who looks like she hasn’t a care in the world as she springs through the windy meadow picking wild flowers and holding onto her hat. For all those still to do a class with Retha, hold onto your hats as you start a fun learning journey with her and don’t miss out on this class.

Retha Joubert Figurine Modelling ClassRetha Joubert Figurine Modelling ClassRetha Joubert Figurine Modelling Class

I can’t say that we breezed out of the class on the Sunday as we had spent 2 days concentrating and focused on our sugar creations, but we did step out each very proud of what we had learned and accomplished. Thank you Retha for your patience with us all and thank you Heidi for making us feel so welcome in your shop and for working behind scenes while we all had fun. Kadies offers a variety of classes including the PME Diploma Courses that Heidi teaches. The course dates can all be found on their website.

Retha Joubert Figurine Modelling Course

Retha Joubert Figurine Modelling ClassRetha Joubert Figurine Modelling ClassRetha Joubert Figurine Modelling ClassRetha Joubert Figurine Modelling Class


E stands for . . . Elf (Edible Alphabet Collaboration – Cake Dutchess)

Elf Figurine for Cake Dutchess Edible Alphabet Collaboration

When it comes to innovation and teaching in this gorgeous world of sugar and cake art, Etty van Urk of Cake Dutchess has to one of the most fun, down to earth and creative leaders we have at the moment. Etty has not only created her gorgeous modelling paste; Cake Dutchess Modelling Paste, but will be launching her new set of high quality stainless steel Modelling Tools in the next few months. Etty is a Craftsy instructor and her adorable animal tutorials are amazing in their creativity and are easy to follow.

Having heard about Cake Dutchess Modelling Paste through her facebook page a few years ago, I started following Etty and learning more about her Modelling Challenges where she creates a sugar piece along with students from all over the world over a period of a few days. My Angel on a Cloud pictured below was my introduction to Etty and her online tutorials.

Angel on Cloud Figurine

Angel on a Cloud Figurine – with Cake Dutchess

Soon after this modelling challenge I was so excited when I won a tub of Cake Dutchess Modelling Paste as it wasn’t available in South Africa at the time. When Etty introduced her Edible Alphabet Collaboration, I immediately thought a naughty little sugar paste Elf would be just the challenge I would love to give myself for the letter E, that I had offered to do. Needless to say, with this modelling paste which is so beautifully pliable, I had such fun creating this figurine.

Elf Figurine for Cake Dutchess Edible Alphabet Collaboration

I drew inspiration for this little guy from a couple of different elf illustrations and gave him his oversized elf boots, knitted jumper, painted striped stockings and leaf embossed cullotes held together with brown sugar twine. For his hair, I wanted him to have a really funky spikey hair style so with Etty’s modelling paste coloured with a hint of light brown, I cut tiny flat pieces of the paste to create this look.

Elf Figurine for Cake Dutchess Edible Alphabet Collaboration

A wood embossed elf-door with its gold details, stepping stones and moss floor details and pretty blossoms set my elf in his own magical enviroment for this collaboration.

Elf Figurine for Cake Dutchess Edible Alphabet CollaborationElf Figurine for Cake Dutchess Edible Alphabet Collaboration

My very precious tub of Cake Dutchess Modelling Paste is now almost empty but fortunately Lollodoo is now a South African supplier of Etty’s awesome paste. It literally halves the modelling time.

Elf Figurine for Cake Dutchess Edible Alphabet Collaboration

Thanks to Kerry Crampton of Fondant Solutions Moulds for this embossing mat which I used for embossing my elf’s woolen jumper.  I can’t wait to try out some more of your embossing mats and moulds as they are such brilliant quality.

Elf Figurine for Cake Dutchess Edible Alphabet Collaboration

Elf Figurine for Cake Dutchess Edible Alphabet Collaboration

Thank you Etty for such a fun collaboration and for all the time and organisation (and grey hairs I am sure) that went into this collaboration.

Please visit the complete Edible Alphabet Collaboration here.

Looking forward to your next collaboration Etty, Animals Around the World

To find out more about Etty read this interview by Mr Bakers Cake.

Elf Figurine for Cake Dutchess Edible Alphabet CollaborationElf Figurine for Cake Dutchess Edible Alphabet Collaboration

Wendy Figurine on Books

Wendy Figurine on Books

As 2018 starts, I find I have a few cakes and sugar pieces that I still have not blogged, however the new year is always a time of reflection of the year that has just swiftly wizzed by, mixed with the anticipation of the beginning of a new chapter. My life, and not just my sugar life, is recorded in special anecdotes on my Cupcakes2Delite blog which you are now reading. Initially I started this blog because I wanted to leave behind some sort of photographic legacy of what I had learnt to create. It then quickly changed into a way that I could show my appreciation for the family and friends in my life and has now shown me just how much I have evolved in these years as a sugar artist.

Wendy Figurine on Books
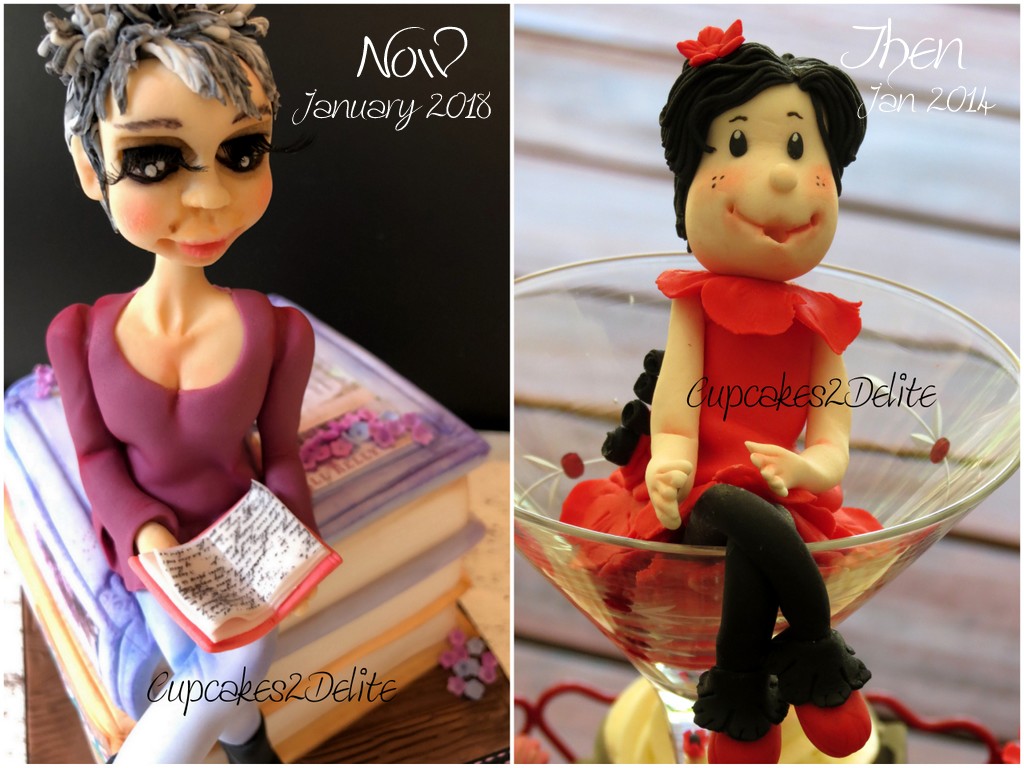
I paid tribute to my blogging guru, Wendy, in Jan 2014, in my post about the Wine Fairy I created for her birthday. The little Wine Fairy captured the character of Wendy with her black bob and red and black outfit. Wendy kept this little figurine all the way to 2017, when she finally true to her name became ‘legless’ (the figurine that is and not Wendy)!!!

Wine Fairy Figurine for Wendy, Jan 2014

Wine Fairy Figurine for Wendy, Jan 2014

With my anticipation for 2018, came the need to say a thank you in the form of an ‘updated’ Wendy figurine for Wendy as all my hours of baking, designing, creating, photographing and writing would not have been recorded if it wasn’t for this blog that Wendy patiently taught me how to set up. Thank you Wendy for sewing that blogging seed in my brain and making it seem like an intriguing way to record my story. Not only has it been fun to write my own posts but it has been fun to be invited to write guest posts on other blogs.

My 2018, Modern Day Wendy Figurine, had to show the Wendy we know today.  You will be pleased to see Wendy, that  you have developed a gorgeous decolletage since 2014,  and your little figurine is showing off your brand new funky, spikey hair style (thanks to Craig and his magic scissors), a sassy new figure and of course most importantly your love for books! I chose the last 3 books you excitedly posted on facebook as a pretty perch for your sugar butt. Thank you for all the gorgeous books, old and new, that you choose for us to read, it certainly makes my literary life that much more interesting!

Wendy Figurine on Books

Thanks to you, I have been able to share my blogging knowledge and encourage others to use blogging as a business tool for their sugar and other work. Thanks to you the pages of my life have a way to be shared with my family, friends, clients and teachers. Enjoy your new little Wendy and here’s to 2018 being a fantastic sequal to 2017!


Wendy Figurine on Books

Wendy Figurine on Books

Wendy Figurine on Books

Sugar Paste Figurines

Now and Then Wendy Figurines

Bo’s 21st Cake

21st Birthday Hat Box Cake

What a pleasure it was to create this cake for Bo for her 21st.  The photos Stephanie, her mom, sent to me showed a beautiful, poised and elegant young woman and it was fun to translate these characteristics into a sugar paste figurine for her 21st Cake.  I had to create long eyelashes, silky brunette hair and a gorgeous curvaceous figure dressed in a sexy deep coral dress.  Bo’s sister, Amy, also wanted me to add on pretty jewelry.  It is all this love and understanding that my clients show for the person who is celebrating that make me want to create the perfect cake for them.

21st Birthday Hat Box Cake

Stephanie and Amy’s idea was to have a Hat Box Cake with their beautiful Bo sitting on the box. As Bo was completing her course in BConsumer Science in Clothing and Retail Management, I thought it would be great to add details reflecting her passions. The cake board I covered in embossed sugar paste with movement on the board to reflect fabric. I added my favourite Crystal Candy Lace I made using Crystal Candy Midnight Garden Lace mat, which I dusted a soft gold.  Gold and silver antique scissors, gold buttons and rolled ‘fabric’ coral roses, a coral rose and a name tag completed Bo’s Coral and Gold Hat Box Cake.

21st Birthday Hat Box Cake

Not only was this cake delectable looking but inside revealed a chocolate cake, layered with raspberry buttercream and coated in chocolate ganache. On collecting the cake, Stephanie and Amy loved the cake and I was delighted that they had trusted me with their order.

Stephanie … ” Thank you Lisa for this beautiful cake, we loved it. “

21st Birthday Hat Box Cake21st Birthday Hat Box Cake21st Birthday Hat Box Cake21st Birthday Hat Box Cake